How to make an Easter bunny cake
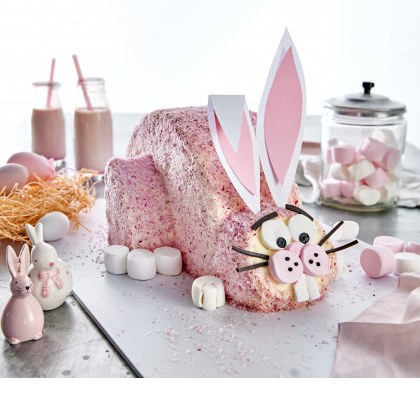
Delight everyone this Easter with a 3D bunny cake! This vanilla cake is so cute and fluffy, with pink coconut 'fur' and a sweet marshmallow face. Below is everything you need to make your own edible rabbit cake, including a video, printable templates and decorating guide.
Easter bunny cake recipe
GET THE RECIPE: Easter Bunny Cake by Fairy
INGREDIENTS
VANILLA CAKES
- 1 x 250g block Fairy margarine, room temperature and diced
- 1 ½ cups (330g) caster sugar
- 3 tsp vanilla extract
- 4 eggs, room temperature
- 1 cup (250ml) milk
- 2 ⅔ cups (400g) self-raising flour, sifted
FAIRY CREAMY ICING
- 1 x 250g block Fairy margarine, room temperature and diced
- 2 ½ cups (400g) soft icing sugar mixture, sifted
- 3 tsp vanilla extract
- 100ml chilled pure cream
DECORATIONS
METHOD
VANILLA CAKES
- Preheat oven 180°C/160°C (fan forced). Grease and line 2 x 20cm round cake tins
- Beat Fairy margarine, sugar and vanilla in a stand mixer fitted with a paddle attachment until light and fluffy. Add eggs one at a time, beat until combined
- Add milk and flour in two batches. Beat on low speed until just combined. Divide into prepared pans and smooth
- Bake 30-35 minutes, or until a skewer comes out clean. Stand for 10 minutes. Turn out cakes onto a wire rack and cool completely
FAIRY CREAMY ICING
- Place Fairy margarine into the bowl of a stand mixer fitted with a paddle attachment. Beat on medium-high until smooth
- Reduce speed to low. Add icing sugar gradually, until well mixed. Increase speed to high and beat for 6 minutes
- Reduce speed to low. Add cream in a steady stream until just incorporated
- Beat on medium-high speed for 2 minutes. Set aside

Top tips for making the vanilla cake
- Make sure all ingredients are room temperature. Cold ingredients won’t incorporate as easily and can increase cooking time. Remove Fairy, eggs and milk from the fridge 1-2 hours before beginning. If you forget to remove the Fairy from the fridge, grate the amount you need into the mixing bowl to help it soften and incorporate more easily.
- Don’t skip lining the cake pans with baking paper. It will help protect the cake from over-browning or drying out. To make this easier, use cooking spray to lightly coat the inside of the tin.
- Use standard 59-60g eggs for this cake. Crack eggs into a separate jug or bowl to avoid bits of shell.
- To evenly distribute the batter between the two tins, divide the total weight of the batter in two to find the weight for each cake.
- If your oven is large enough, place both cakes on the middle shelf leaving a good space in between. If not, place one cake on the lower shelf and the other on the middle shelf. Swap cakes over halfway through the cooking time so they cook evenly.
- To check cakes are cooked, poke a skewer or the tip of a knife into the centre of the cake. It should come out clean. If it doesn’t, bake the cakes for another 5 minutes.
- The cakes will be too delicate to turn out right away, let cake tins stand on a wire rack for 10 minutes first.
- Make and freeze these cakes (without icing) up to 4 weeks ahead. Once cake is cooled completely, wrap well in cling film and freeze.
Tips for making the icing
- Use room temperature Fairy and cream, remove from the refrigerator 1-2 hours before using. If you forget, grate the Fairy directly into your mixing bowl. If cream is fridge cold, place in microwave for 10-15 seconds to take off the chill.
- Use soft icing sugar mixture (with cornflour added) to prevent the icing from setting hard. Instead it will remain a silky, fluffy texture.
- Don’t add the cream all at once, add it in a stream to avoid splitting the icing.
- For best results, decorate using room temperature icing. If it gets too soft, chill in the refrigerator until workable.
Tips for decorating and assembling
Cold is gold
Always work with cold cake, either straight from the fridge or even partially frozen. Cutting, assembling and icing will always be easier with a very cold cake. Between steps, return the cake to the fridge to firm up before continuing.
Size does matter
A large, long knife will make it much easier to create even straight cuts when you’re trimming the tops or cutting the cake into pieces. When you’re doing more detailed trimming around the head and legs, swap to a smaller knife.
Stop the stick
Cutting marshmallows and other lollies is much easier if you lightly grease your scissors and knives. Spray lightly with cooking oil or grease with vegetable oil to stop the lollies from sticking.
Storing the bunny cake
The whole, iced bunny cake can be stored, uncovered, for up to two days in the fridge. Clear a shelf away from anything that could drop on it. Remove any ingredients from the fridge that may transfer their flavour, such as onion, garlic or seafood.
Once cut, store in an airtight container in the fridge.

Learn more about Fairy


